How to Fit Your Staircase
Once Finished Please Leave it!
This is the number 1 rule in staircase assembly. Once your staircase has been fully fitted on site and all the straight treads and winding treads have all been glued and screwed and wedged into place do not walk up and down it for 24 hours. This allows for the glue to go off and fully set. This may not sound important but if you do not follow this first rule your staircase treads may squeak.
Component Parts
All your straight treads & risers are pre-cut to length & width, so please do not amend or trim anything, If you are unsure please do not hesitate in contacting our technical department on info@timberstaircases.com.
This Guide may not tell you all you need to know
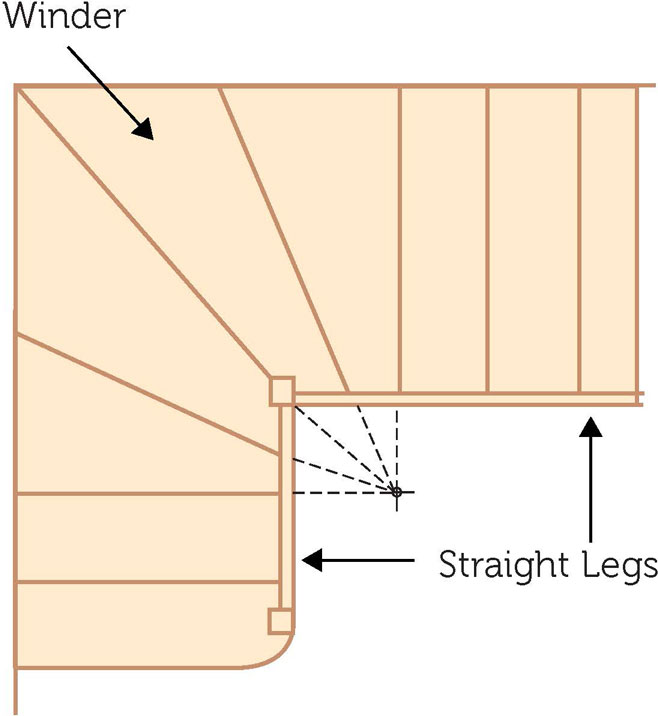
The following staircase assembly guide is specifically only useful for the assembly of the straight element of a timber staircase, if your staircase has a turn comprising of winder treads then please also see the following guide (how to fit winder treads)
No Gaps Allowed
Please do not leave any gaps during assembly of your staircase. All treads should fit tight into the trench in the string and wedges must be fitted tightly.
Step 1
The first thing you do is lay down your strings on the floor in a pair, please note if your staircase has newel posts then the treads will be notched, the notch goes where the Tennon is. Dry Fit 3 treads down the flight, knocking the wedge in a bit, With the aid of some help if required turn that section over and place into the corresponding trenches in the second string, again knock 3 wedges in to secure treads.
Step 2
Lay the flight down (Nosing’s facing downwards) Measure over all string and make sure it’s the width on your cad drawing, check the staircase for square using a tape measure from reference points, we use the trenching points at the top and bottom of the flight for this, and adjust if necessary. Once you are happy place all the other treads into position, place sash clamps across the staircase using packers so not to bruise the outer face of the strings. Glue wedges and knock home tight.
Step 3
Now it’s time to fit the risers into place. Please note the bottom riser is smaller by the finished thickness of the staircase tread, so make sure this is used for the first riser, then place the risers into the strings. Once all are dropped into place glue the wedges and hit them home tight.
Step 4
Remove the sash clamps and screw your risers to the back of the treads, using a chisel prize open a slight gap between the tread and the riser, then run a small bead of PVA along the back edge of the tread where the riser will meet. Beware not to use too much glue especially if the staircase is not to be carpeted as the glue can be difficult to remove from the face of your staircase. It is important to run the bead of glue from the underside of the staircase. You are now ready to screw the back of the riser to the back of the tread, if your treads are MDF we recommend 40mm MDF wood screws, we use five, please take care not to over tighten causing the screw to spin, if this happens then re fix at the side in a slightly different position, if your treads are timber then please pre drill using a 2-3mm diameter drill bit, then once you have screwed all your risers you are known ready to fit your glue blocks, fitting 3 per tread use copious amounts of glue and rub into place.
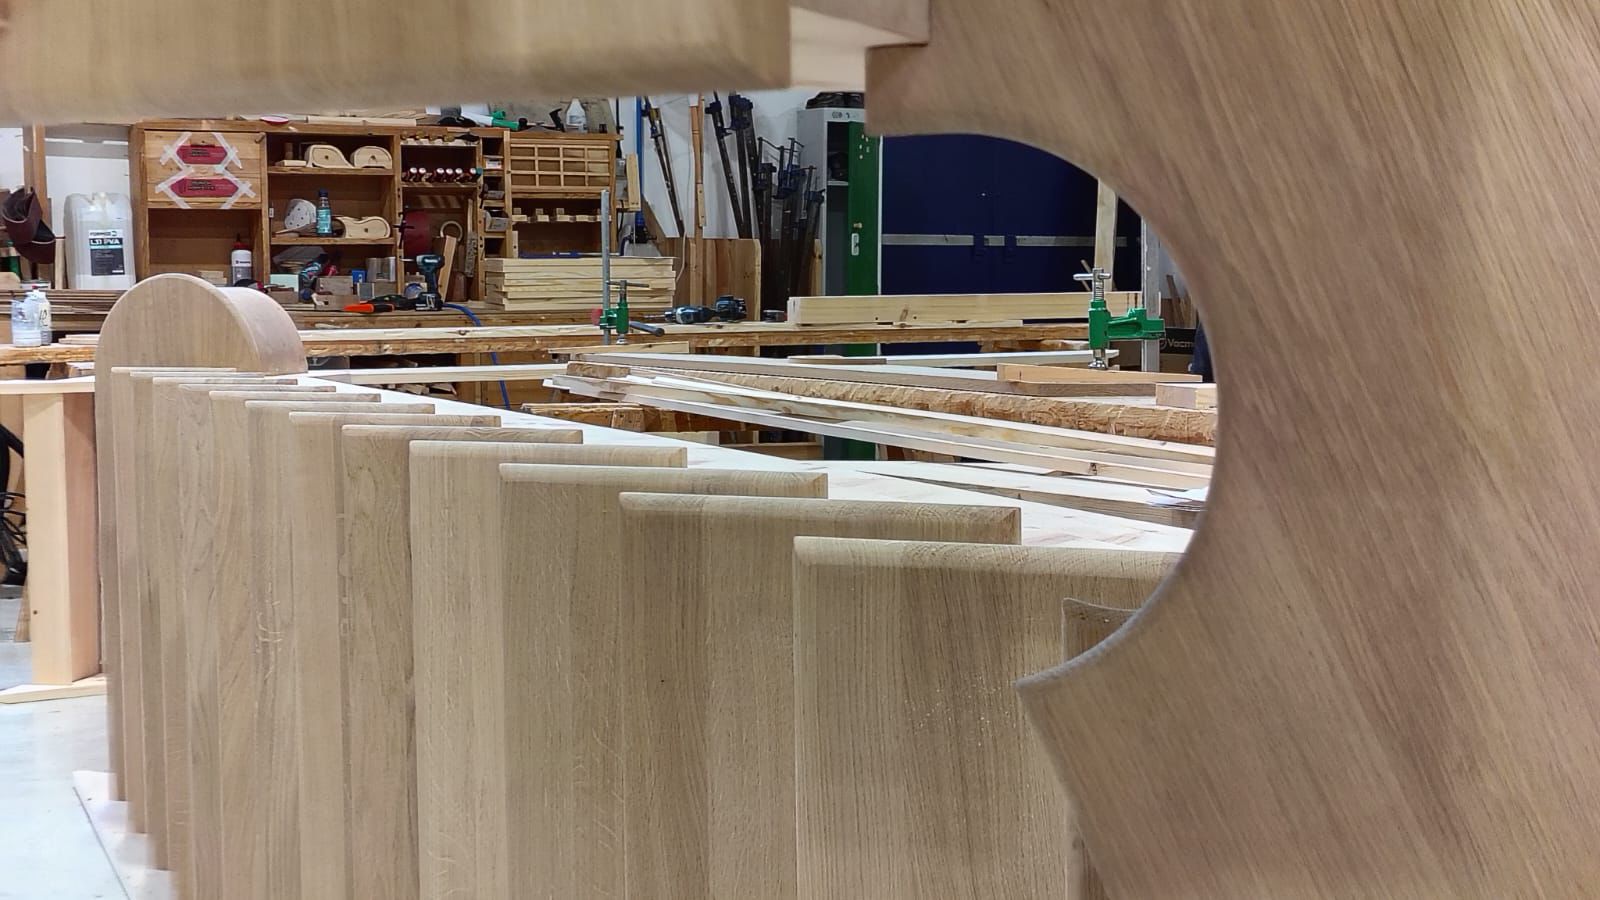
Staircase assembly
When a staircase arrives from Timber Staircases, the winder on the staircase has been dis-assembled. The straight runs of our staircase remain assembled. This will allow you to manoeuvre the staircase through the front door into its correct position.
Click here to download our Installation Guide
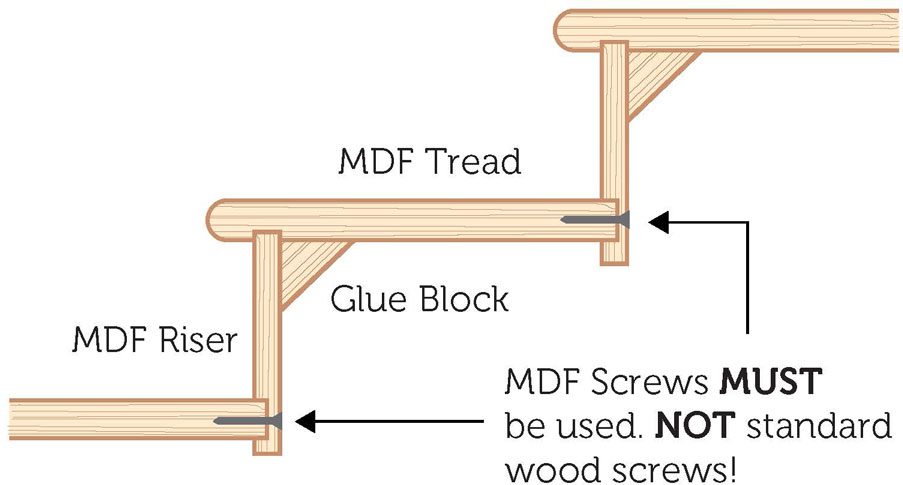
If you have ordered MDF treads for the winder box, then you MUST NOT use standard wood screws. Using normal screws designed for hard or softwood can cause the MDF to bulge and eventually split.
For MDF treads and risers, a slightly different approach is needed. No pre-drilled holes are needed for MDF, as it is recommended to use special MDF screws. These have the added benefit of not splitting the MDF board, which can occur when drilling pilot holes or using unsuitable screws. The secret of the MDF screw lies in its structure; a serrated thread means it cuts cleanly through the board without bulging or splitting the wood.
Timberstaircases.com sell a number of products to finish your staircase. Remember if you have any questions please do not hesitate to contact us about your staircase finish. We are a friendly company and you can telephone us on 01279 598 520.
Why not check out our Online Staircase Builder